StepPlease follow this step-by-step guide to configure Teltonika RUT950.
Hardware installation
...
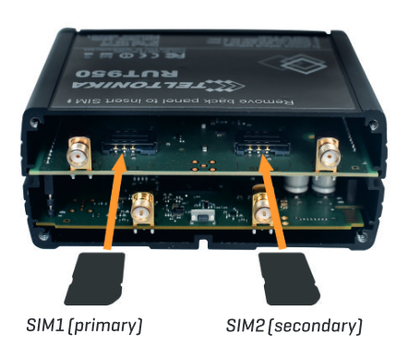
Remove back panel and insert SIM card as shown in photo. Then put back the panel and attach LTE and WiFi antennas.
...
Connect the power adapter to the socket on the front of the device. Then plug the other end of the power adapter into the power socket.
...
Connect to the device
...
wirelessly (SSID: Telktonika_Router) or use Ethernet cable and plug it to any LAN port.
Configure your computer (Windows):
...
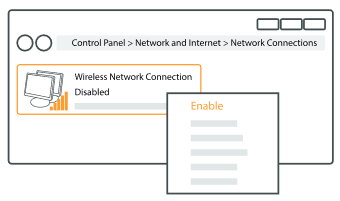
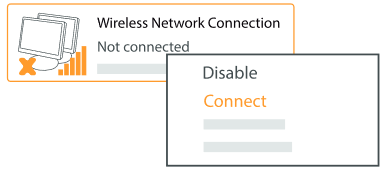
Enable the wireless network connection (go to Start - Control Panel - Network and Internet - Network and sharing center. In the left panel click Change adapter settings link. Right click on Wireless
...
network Connection and select Enable).
...
...
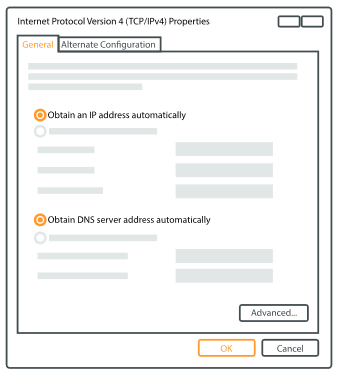
Setup wireless network adapter on your computer (right click on Wireless network connection and select Properties. After that select Internet Protocol version 4 (TCP/IP) and click Properties).
...
Select Obtain IP
...
address automatically and Obtain DNS server address automatically if they are not selected. Click OK.
...
...
Right click on Wireless network connection and select Connect to see available wireless networks.
...
...
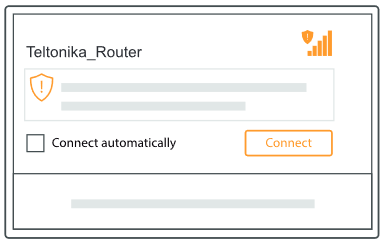
Choose the wireless network Teltonika_Router from the list and click Connect.
Login to device
...
| Info |
|---|
If your Teltonika has version RUT2_R_00.07.03 or higher follow this manual: Teltonika router configuration (new WEB UI) |
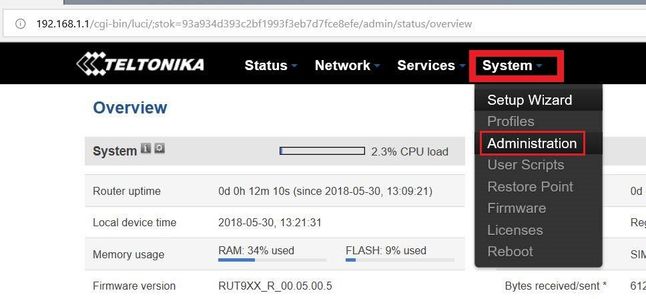
To enter router Web interface type http://192.168.1.1 in your browser
...
Use default username: admin and password: admin01 when prompted for authentication. In version RUT9XX_R_00.05.00.5 you will be asked to change password before you can continue.
...

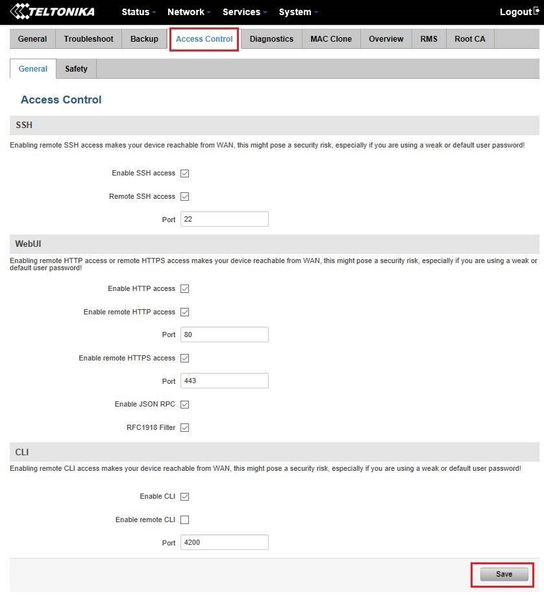
Click System - Administration and choose Access Control:
...
...
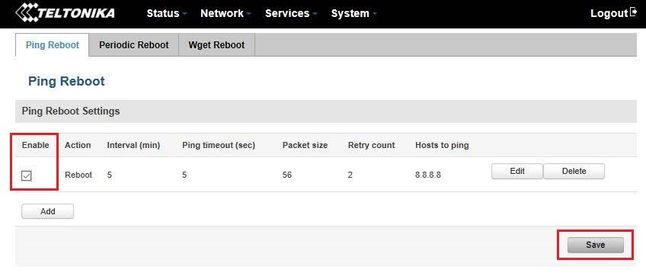
Click Services - Auto reboot - use IP address that you can ping from this SIM card and APN (OCEAN IP, radius server IP, ... )
...
...
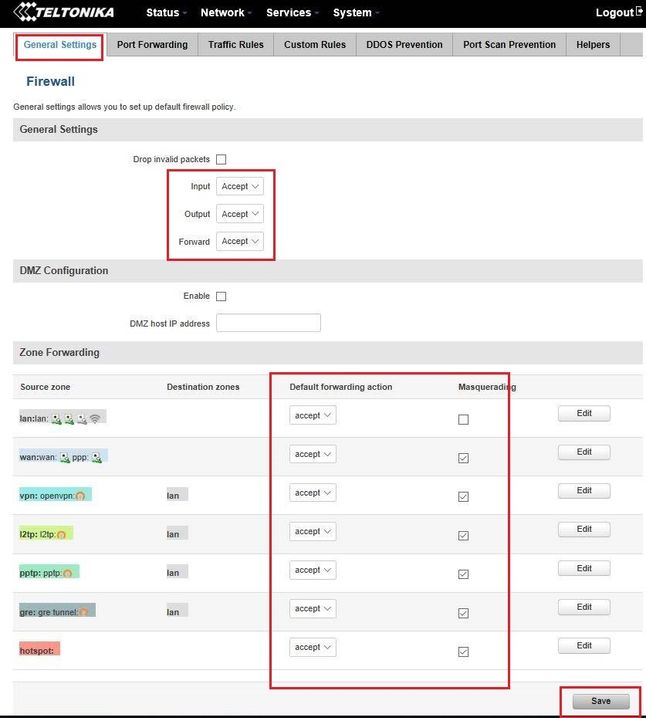
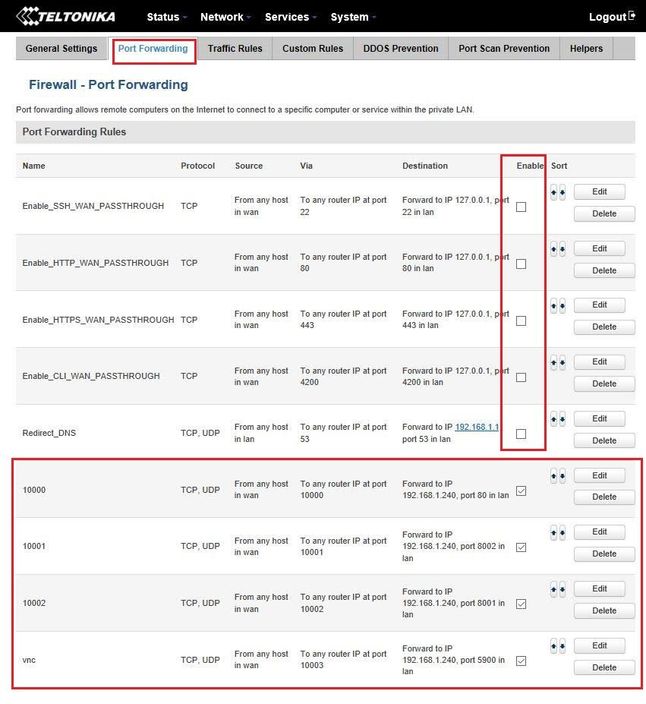
Click Network - Firewall and then Port forwarding. If you have more charging station connected to the same router you will have to make more forward rules to each station. In that case you will also have to change IP of the charging station.
...
...
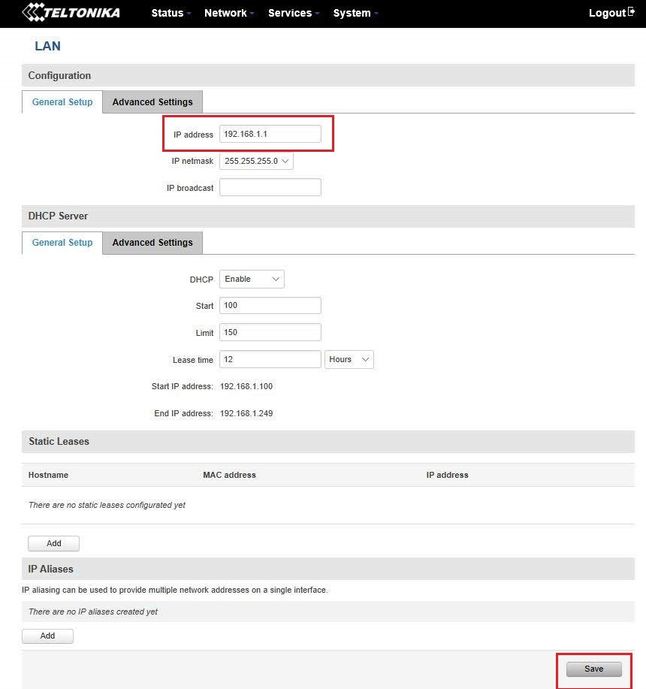
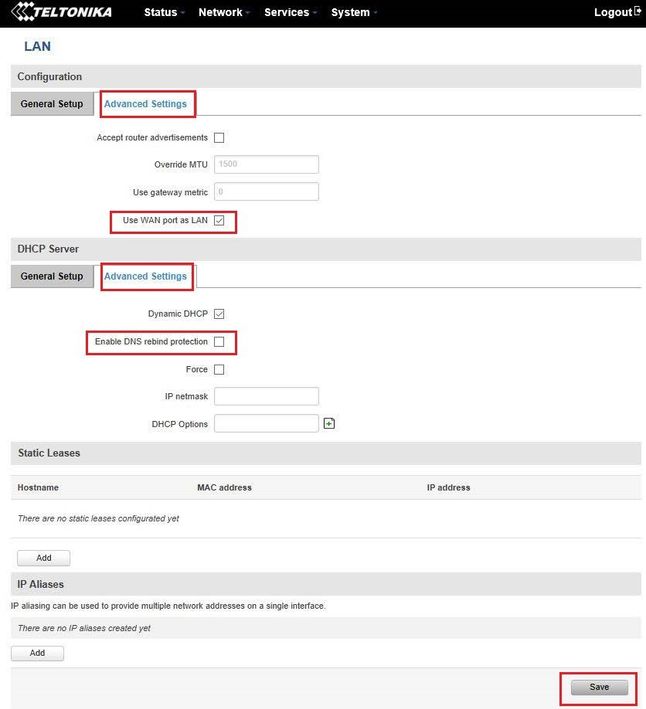
Click Network - LAN. You can change router IP here if needed. Go to Advanced settings after that
...
...
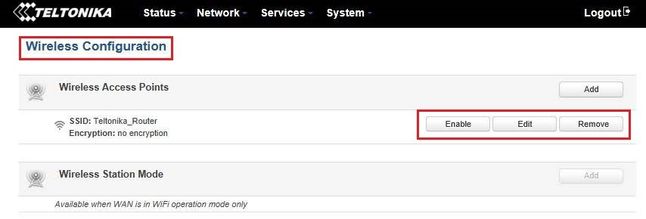
Click -Network - Wireless and disable this option if not needed
...
...
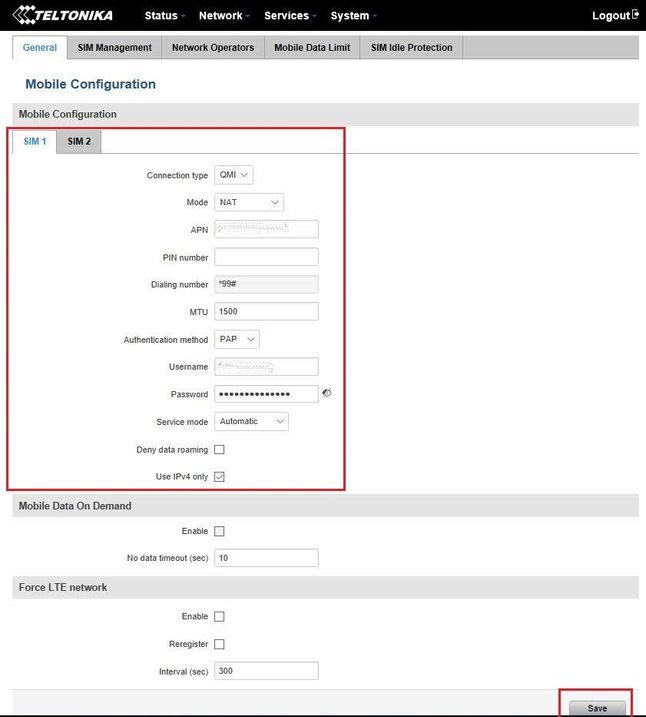
Click Network - Mobile and configure APN settings
...
...
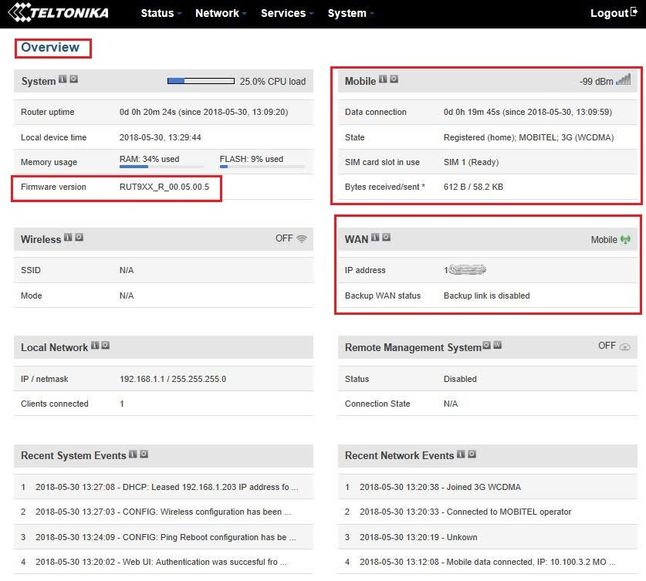
Click Status - Overview. If your APN settings are correct you will see IP and mobile state:
...
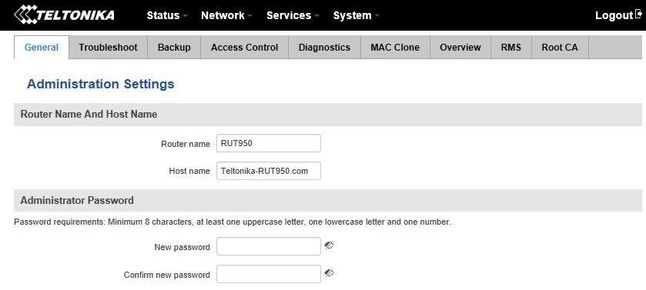
If you want to change password or router name click System - Administration
...